This manual details the installation, commissioning, and servicing of the Worcester Greenstar 24i/28i Junior combination boiler.
It’s a comprehensive guide for professionals, ensuring safe and efficient operation.
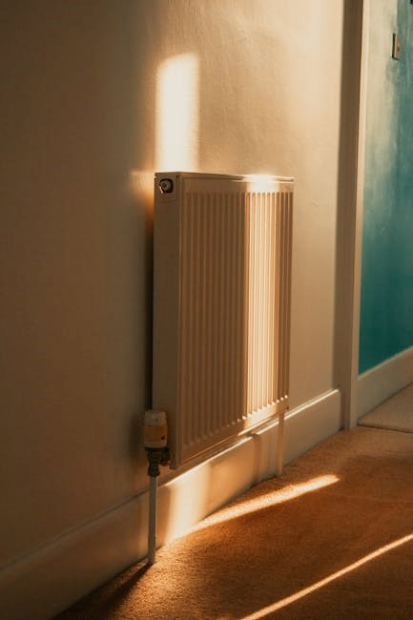
The 28i Junior is a wall-hung, gas-fired condensing boiler, offering reliable heating and hot water.
Understanding these instructions is crucial for optimal performance and longevity.
Boiler Overview and Specifications
The Worcester Greenstar 28i Junior is a highly efficient, wall-mounted condensing combination boiler designed for central heating and domestic hot water. This unit, detailed in the 47-406-57 manual (downloaded from Manualslib.com), boasts a compact design suitable for various installation locations.
Key specifications include a central heating output of 24kW or 28kW (depending on the model), and a domestic hot water flow rate capable of serving typical household demands. The boiler operates on natural gas and features a modulating output for optimal efficiency. The display panel provides crucial operational information, including burner status and fault codes.
Its condensing technology maximizes heat recovery, reducing gas consumption and emissions. The unit’s electronic ignition and comprehensive safety features ensure reliable and safe operation. Refer to the preface (6 720 802 048, 2013/05) for specific model details.
Intended Use and Limitations
The Worcester Greenstar 28i Junior is intended for domestic use, providing central heating and hot water in residential properties. It’s designed for sealed system applications and is suitable for use with radiators or underfloor heating. This boiler, as outlined in the installation manual, is specifically for indoor installation only.
Limitations include a requirement for a suitable gas supply and electrical connection. It’s not designed for commercial applications or use in corrosive environments. The boiler’s performance is dependent on proper installation, commissioning, and regular servicing.
Operation outside of specified parameters, such as incorrect gas pressure or inadequate ventilation, can affect performance and safety. Always adhere to the guidelines within the provided documentation to ensure optimal and safe operation.

Safety Precautions
Always read and understand these instructions carefully before installation or servicing. Gas and electrical safety are paramount; follow all warnings to prevent hazards.
Incorrect installation can lead to dangerous situations. Prioritize safety throughout the entire process.
General Safety Warnings
Prior to commencing any work on the Worcester Greenstar 28i Junior, ensure a complete understanding of these instructions. Installation and servicing must be performed by qualified and competent personnel adhering to all relevant regulations and standards. Always isolate the gas and electrical supplies before undertaking any maintenance or repair work.
Never attempt to modify the boiler in any way, as this could compromise its safety and performance. Ensure the installation environment is well-ventilated and free from flammable materials. Be aware of potential hazards such as hot surfaces and sharp edges. Regularly check for gas leaks using appropriate leak detection methods.
Always use the correct tools and equipment for the job, and wear appropriate personal protective equipment (PPE). Do not operate the boiler if it is damaged or malfunctioning. Report any faults immediately to a qualified service engineer. Failure to follow these warnings could result in serious injury or property damage.
Gas Safety Considerations
Crucially, all gas work relating to the Worcester Greenstar 28i Junior must comply with current gas safety regulations. Ensure the gas supply pressure is within the specified limits detailed in the installation manual. Always use gas-tight connections and appropriate jointing compounds approved for natural gas or LPG.
Thoroughly test all gas connections for leaks using a suitable leak detection fluid after installation or any subsequent work. Verify adequate ventilation is provided to prevent the build-up of combustion gases. Never attempt to repair gas components; replace them with genuine Worcester Bosch parts.
Regularly inspect the flue for any signs of damage or blockage, ensuring it is correctly installed and sealed. Be aware of the risks associated with carbon monoxide poisoning and install a carbon monoxide detector as a precaution. Qualified Gas Safe registered engineers only should undertake gas work.
Electrical Safety Guidelines
Prior to any electrical work, ensure the boiler is completely isolated from the mains electricity supply. Confirm isolation using a suitable voltage indicator. All electrical installations must adhere to current IET wiring regulations. Utilize appropriately rated fuses and circuit breakers for the boiler’s electrical requirements.
Employ correctly sized and certified cable for all connections, protecting it from physical damage. Earth the boiler correctly, verifying the earth connection’s integrity. Avoid creating any potential earth loops. Never work on live electrical components.
Inspect all wiring for damage or deterioration before connecting. Qualified electricians only should undertake electrical work. Refer to the wiring diagram within the installation manual for correct connections. Regularly check electrical connections for tightness and corrosion.
Unpacking and Inspection
Carefully unpack the boiler and verify all components listed in the package contents are present. Inspect for any transit damage immediately, noting any issues on the delivery note.
Retain the packaging for potential returns; Report any discrepancies or damage to your supplier promptly to initiate a claim.
Checking Package Contents
Upon receiving your Worcester Greenstar 28i Junior, meticulously verify the package contents against the supplied delivery note. Ensure the following items are present: the boiler unit itself, the installation template, a flue elbow, mounting brackets, and all necessary fixings. Confirm the presence of the user manual and the separate installation and servicing guide – crucial for correct setup and future maintenance.
Additionally, check for the gas connection kit, including seals and pipe adaptors. Inspect for any included documentation regarding warranty registration. Missing components should be reported to your supplier immediately. Do not proceed with installation until all parts are accounted for, as this could compromise the boiler’s performance and invalidate the warranty. A complete inventory is vital for a smooth installation process.
Identifying Boiler Components
Familiarize yourself with the key components of the Worcester Greenstar 28i Junior. Locate the front control panel, displaying operational status and error codes. Identify the primary heat exchanger, crucial for efficient heating, and the fan assembly, responsible for flue gas extraction. Note the gas inlet connection point and the water inlet/outlet connections.
Recognize the flue outlet, where the exhaust gases are expelled. Understand the function of the pump, circulating hot water throughout the system. Pay attention to the pressure relief valve, a safety feature. Refer to the diagrams in the installation guide for precise component locations. Proper identification is essential for correct installation and servicing procedures.
Damage Inspection Procedure
Upon delivery, carefully inspect the Worcester Greenstar 28i Junior for any signs of damage. Check the outer casing for dents, scratches, or deformation. Examine all visible components, including the control panel, heat exchanger connections, and pipe fittings. Verify the integrity of the packaging – any damage to the box suggests potential internal issues.
Document any observed damage with photographs, noting the extent and location. Do not install a damaged boiler; contact your supplier immediately to report the issue and arrange for a replacement. Retain all packaging materials until the inspection is complete. Failure to report damage may invalidate the warranty.

Installation Requirements
Proper installation demands a suitable site, correct gas supply, and appropriate electrical connections. Adherence to local regulations and these instructions is essential for safe operation.
Ensure adequate ventilation and compliance with all relevant building codes before commencing installation procedures.
Site Preparation
Before installing the Worcester Greenstar 28i Junior, careful site preparation is paramount. The chosen location must provide adequate space for installation, servicing, and compliance with ventilation requirements as outlined in local regulations. Ensure the wall is capable of supporting the boiler’s weight, even when fully pressurized with water.
Verify the area is free from flammable materials and protected from potential water damage. Consider accessibility for future maintenance and servicing. A level, stable surface is crucial for secure mounting. Confirm sufficient clearance around the boiler for safe access to all components. Adequate lighting should also be available for installation and servicing purposes. Finally, ensure the floor is capable of supporting any potential water leaks.
Gas Supply Requirements
The Worcester Greenstar 28i Junior requires a gas supply conforming to local regulations. Ensure the gas supply pressure is within the boiler’s specified operating range – typically G1 (1.5psi). A correctly sized gas pipe is crucial for optimal performance; undersized pipes can restrict gas flow, while oversized pipes are unnecessary.

Install a gas shut-off valve upstream of the boiler, readily accessible for maintenance and emergencies. Always use gas-tight joints and appropriate sealing compounds. Leak test all gas connections thoroughly with a suitable leak detection fluid. Compliance with gas safety regulations is non-negotiable. A Gas Safe registered engineer must perform all gas connections and commissioning.
Electrical Supply Requirements
The Worcester Greenstar 28i Junior requires a 230V/50Hz electrical supply, connected via a suitable fused spur. Ensure the electrical supply is earthed and complies with current IET wiring regulations. A 3A fuse is typically sufficient, but verify the specific rating in the boiler’s documentation.
Install the boiler with a readily accessible isolation switch, allowing for safe disconnection during servicing. Always use appropriately sized cable for the current load and distance. Protect the electrical supply cable from physical damage. A qualified electrician must perform all electrical connections and verify correct operation. Compliance with electrical safety standards is paramount;

Boiler Mounting and Connections
Securely mount the boiler to a suitable wall using appropriate fixings. Connect gas and water pipes, adhering to regulations. Ensure proper sealing to prevent leaks.
Wall Mounting Procedure
Prior to mounting, verify the wall’s structural integrity and suitability for supporting the boiler’s weight. Utilize the provided mounting template to accurately mark drilling locations, ensuring correct boiler positioning. Drill pilot holes and insert appropriate wall plugs, compatible with the wall material.
Carefully align the boiler with the marked positions and secure it using the supplied mounting screws. Confirm the boiler is level using a spirit level, adjusting as necessary. Ensure a minimum clearance around the boiler for servicing and ventilation, as specified in the manual. Double-check all fixings are tightened securely, preventing any movement or instability. Proper mounting is critical for safe and efficient operation.
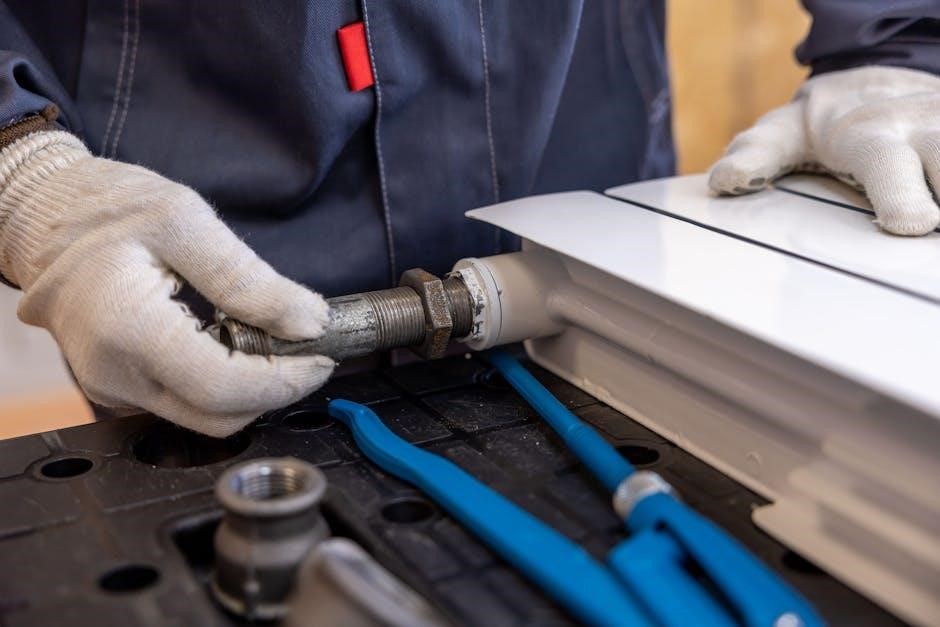
Gas Pipe Connection Details
Before connecting, isolate the gas supply and ensure compliance with local regulations. Use a qualified Gas Safe registered engineer for all gas connections. Employ appropriate gas pipe material, sized correctly for the boiler’s gas consumption and supply pressure. Apply a suitable jointing compound, conforming to BS EN 1856, to all threaded connections.
Connect the gas pipe to the boiler’s gas inlet, ensuring a tight and gas-tight seal. Perform a gas tightness test using a suitable leak detection fluid, checking all joints for leaks. Purge the gas pipework to remove any air or debris before turning on the gas supply. Verify correct gas pressure at the boiler inlet, as specified in the installation manual;
Water Pipe Connection Details
Ensure the cold water supply is within the specified pressure range for the boiler – typically 1.5 to 8 bar. Use 22mm copper or plastic pipework for both cold water inlet and hot water outlet connections. Install appropriate isolation valves on both supply and return pipes for maintenance purposes. Employ a tundish and discharge pipe for the pressure relief valve, directing water safely to a suitable drain.
Connect the pipework to the boiler’s fittings, using compression fittings or solder joints as appropriate. Avoid creating airlocks in the system by ensuring a smooth, continuous pipe run. Flush the system thoroughly to remove any debris before connecting to the boiler. Check for leaks after commissioning and address them immediately.

Control and Wiring
The wiring diagram details connections for power, controls, and external devices. Connecting the control panel requires careful adherence to the provided schematic for proper function.
Timer and remote control setup allows for programmed heating schedules and convenient operation, enhancing user comfort and energy efficiency.
Wiring Diagram Explanation
The wiring diagram, a critical component of the installation manual, visually represents the electrical connections within the Worcester Greenstar 28i Junior. It details the relationships between the boiler’s internal components – such as the fan, pump, and gas valve – and external controls like thermostats and timers.
Understanding the diagram requires identifying each component’s symbol and tracing the corresponding wires. Pay close attention to the color coding, as it indicates the function of each wire (live, neutral, earth). Incorrect wiring can lead to malfunction or safety hazards. The diagram also illustrates the connection points for optional accessories, like remote control units. Always refer to the diagram during installation and servicing to ensure accurate and safe connections.
Furthermore, the diagram clarifies the voltage requirements for each component, preventing damage from over or under-voltage. Proper interpretation of this diagram is essential for qualified heating engineers.
Connecting the Control Panel
The control panel connection is a vital step in the Worcester Greenstar 28i Junior’s installation. Referring to the wiring diagram, carefully connect the control panel to the boiler’s designated terminal block. Ensure the power supply is isolated before commencing any electrical work.
Match the wire colors precisely to the terminal markings, typically labeled for live, neutral, and earth connections. Securely tighten each screw terminal to prevent loose connections, which can cause intermittent faults. Double-check all connections against the diagram before restoring power.
Proper connection enables the control panel to manage heating schedules, hot water demand, and display diagnostic information. Incorrect wiring can damage the control panel or the boiler itself, so meticulous attention to detail is crucial.
Timer and Remote Control Setup
Following control panel connection, configure the timer and remote control for personalized heating management. Access the settings menu via the control panel interface, navigating to the timer programming section. Set desired heating schedules, specifying on/off times and temperature levels for different days of the week.
For remote control functionality, pair the remote with the boiler according to the manufacturer’s instructions. This typically involves pressing a specific button sequence on both devices. Once paired, the remote allows convenient control of heating and hot water from anywhere in the room.
Test the timer and remote functions thoroughly to ensure accurate operation and user convenience. Refer to the user guide for detailed programming options and troubleshooting tips.

Commissioning and Testing
Proper commissioning involves filling, pressurizing, gas rate adjustment, and functional testing. Verify correct operation and safety before handing over to the customer.
Ensure all connections are secure and the system is leak-free for optimal performance.
Filling and Pressurizing the System
Before initial start-up, the system must be thoroughly filled and pressurized to the correct operating pressure, typically between 1 and 1.5 bar. Begin by ensuring all automatic air vents are open. Connect a filling loop to the system, utilizing the filling loop connection points on the boiler and the return pipework.
Slowly open the filling loop valves to allow water to enter the system, monitoring the pressure gauge on the boiler. As the system fills, air will be purged through the automatic air vents. Close the filling loop valves once the desired pressure is reached. Remove the filling loop. Check for any leaks at connections and tighten as necessary. Finally, verify the system pressure remains stable.
Important: Do not over-pressurize the system.
Gas Rate Adjustment
Gas rate adjustment must be carried out by a qualified and competent gas engineer, adhering to all relevant safety regulations. Access the gas valve via the designated access panel on the boiler. Using the appropriate tools, carefully adjust the gas rate setting to match the boiler’s specified input rating.
Refer to the boiler’s data plate for the correct gas rate. Monitor the flue gas analysis during adjustment to ensure optimal combustion efficiency and minimal emissions. Verify the gas pressure at the inlet to the gas valve is within the specified range. Record the final gas rate setting for future reference. Ensure all gas connections are tight and leak-free.
Caution: Incorrect gas rate adjustment can lead to unsafe operation.
Functional Testing Procedure
Following commissioning, a thorough functional test is essential. Initiate the central heating and domestic hot water modes, verifying correct operation. Check for any unusual noises or leaks during operation. Monitor the boiler’s display panel for error codes or fault indications. Confirm the hot water temperature reaches the desired setpoint.
Test the boiler’s response to thermostat calls for both heating and hot water. Observe the modulation of the burner to ensure efficient operation. Verify the condensate drain is functioning correctly. Record all test results for documentation. Ensure the system pressure remains stable throughout testing.
Caution: Address any issues immediately before leaving the installation.
Troubleshooting Common Issues
This section details error code interpretation, lockout reset procedures, and solutions for no hot water issues. Refer to the fault code list for diagnosis.
Effective troubleshooting ensures quick resolution and minimizes downtime for the user.
Error Code Interpretation
The Worcester Greenstar 28i Junior utilizes a diagnostic system displaying error codes to indicate faults. Understanding these codes is vital for efficient troubleshooting. A flashing reset light (1) signifies a lockout, requiring code identification.
For example, a specific code directs users to call Bromford for assistance, while others may allow a simple reset. Consult the comprehensive error code table within this manual for detailed explanations of each code’s meaning and recommended corrective actions. Ignoring error codes can lead to further damage or unsafe operation.
Always document the error code before attempting any repairs, and refer to qualified personnel if unsure about the appropriate course of action. Proper interpretation ensures accurate diagnosis and effective resolution of boiler issues.
Lockout Reset Procedures
When the Worcester Greenstar 28i Junior experiences a lockout – indicated by a flashing reset light (1) – a reset procedure is often necessary. Initially, attempt a simple reset by pressing and holding the reset button located on the control panel for approximately three seconds.
If the boiler fails to restart after a reset, investigate the cause of the lockout by referencing the error code interpretation section of this manual. Repeated lockouts suggest an underlying issue requiring professional attention. Do not repeatedly reset the boiler without addressing the root cause.
Always ensure gas and electrical supplies are stable before attempting a reset. If problems persist, contact a qualified heating engineer for assistance.
No Hot Water Troubleshooting
If your Worcester Greenstar 28i Junior isn’t providing hot water, first check the domestic hot water (DHW) tap is fully open. Verify the boiler is set to ‘Hot Water’ mode on the control panel; Ensure the system is adequately pressurized – low pressure can inhibit hot water production.
Inspect for error codes, as these indicate specific faults. A blocked flue or air in the system can also cause issues. If the boiler fires but water remains cold, a diverter valve fault is possible.
For persistent problems, consult a qualified engineer. Do not attempt complex repairs yourself.

Maintenance and Servicing
Regular maintenance, including descaling, is vital for optimal performance. Annual servicing by a qualified engineer ensures safety and efficiency, extending boiler lifespan.
Regular Maintenance Tasks
Consistent upkeep is crucial for the Worcester Greenstar 28i Junior’s longevity and efficiency. Visually inspect the boiler annually, checking for any leaks or corrosion around pipework and connections. Ensure the flue is unobstructed and securely fitted, as proper ventilation is paramount for safe operation.
Periodically check the system pressure, maintaining it within the manufacturer’s recommended range – typically between 1 and 1.5 bar. Clean the boiler casing externally with a damp cloth, avoiding abrasive cleaners. Monitor the condensate pipe for blockages, especially during colder months, to prevent freezing and potential damage. Remember, these tasks supplement, but do not replace, professional servicing.
Document all maintenance performed, including dates and any observations, for future reference and service history.
Descaling Procedures
Scale buildup within the Worcester Greenstar 28i Junior can significantly reduce heating efficiency and potentially cause component failure. Descaling, performed by a qualified engineer, involves flushing a descaling solution through the heat exchanger to remove mineral deposits.
The process typically requires isolating the boiler and connecting a descaling pump and container. Follow the descaling solution manufacturer’s instructions carefully, adhering to recommended concentrations and contact times. Thoroughly flush the system with clean water after descaling to remove all traces of the solution.
Regular descaling frequency depends on water hardness; areas with hard water will require more frequent attention. Professional assessment is vital to determine the appropriate schedule.
Annual Servicing Recommendations
Annual servicing by a Gas Safe registered engineer is crucial for maintaining the Worcester Greenstar 28i Junior’s efficiency and safety. Servicing includes a comprehensive inspection of all components, checking for wear and tear, and ensuring optimal performance.
Key checks involve the flue, gas pressure, burner, and heat exchanger. The engineer will also assess the system’s controls and safety devices. Regular servicing helps identify potential issues before they escalate, preventing costly repairs and ensuring continued reliability.
Maintaining a service record is recommended. Adhering to these recommendations extends the boiler’s lifespan and guarantees peace of mind.